Git for Data Engineers: Unlock Version Control Foundations in 10 Minutes
From zero to productive: an easy-to-follow guide to understanding Git’s core concepts and applying them to real-world data engineering projects.
Check my Git Playlist to read more about using Git in Data Engineering.
Greetings, curious reader,
When I started writing my first lines of code, even before stepping into data engineering, we used an FTP server to host ZIP files with versions of our code.
Each ZIP file had a timestamp or a version number in its name, like project_v1.zip, project_final.zip, or even project_final_final_v2.zip.
If someone needed to make a change, they would download the latest ZIP file, edit it, and then upload a new version to the server.
It didn’t take long for problems to appear.
What if two people downloaded the same ZIP file and made changes at the same time? The first person to upload their new version would overwrite the other person’s work.
As projects got more complex, trying to version these files with ZIP archives or manual file naming systems became a nightmare.
That’s when my coworker and I (yes, we were a team of two) discovered Git.
With Git, you can track every change you make to your code, experiment without affecting the main version, and collaborate with others. Instead of juggling ZIP files or worrying about overwriting someone’s work, Git gives you a structured way to organise your code, undo mistakes, and ensure your projects run.
In this article, I’ll walk you through Git’s core concepts, explain how it works under the hood, and show you how to use it for real-world data engineering projects. Enjoy!
🔗 Why Git Matters for Data Engineers
The Current State 🛠️
In data engineering, collaboration is the norm. Even if you are a team of one, you’re often part of a team, working alongside other people.
99% of your tasks involve editing shared codebases—sometimes with multiple people working on the same files at the same time. Without a version control system like Git, this kind of collaboration becomes chaotic.
For example, imagine you’re fine-tuning a Python script that automates data ingestion. At the same time, a colleague is implementing a new feature in the same script. You could overwrite their work without a clear way to track your changes. Worse, if you delete a critical part of the code, you might not even realise it until it’s too late to recover.
This is why Git has become a must-have skill in the data engineering toolkit.
Just think of it: there are over 100 million people on GitHub.
It allows teams to collaborate seamlessly, ensures accountability by tracking who made what changes, and provides a safety net by enabling you to roll back to earlier versions of your code.
The Stakes 🔥
Let’s break the stakes down:
🤝 Collaboration Breakdowns: Without Git, teamwork becomes difficult. Code can be accidentally overwritten, or changes can conflict with one another, leading to hours wasted manually reconciling issues.
🗑️ Lost Work: Data pipelines, infrastructure scripts, and SQL queries evolve over time. If you don’t use Git to track changes, there’s no way to recover a working version if something breaks.
🐞 Debugging Nightmares: Let’s say your data pipeline suddenly starts failing. Without a clear history of changes, tracing the source of the problem can be a time-consuming, frustrating process. Git’s history log can save hours by showing when a breaking change was introduced.
By mastering Git, you set yourself up for success. You’ll collaborate more effectively, save time debugging, and confidently handle larger, more complex projects.
🔍 Deep Dive in Core Concepts
What is Git ❓
Git is a distributed version control system. This means it tracks changes to your code and saves snapshots of your project at different points in time. These snapshots, or save points if you wish, allow you to revert to any previous version of your project if something goes wrong.
But Git goes far beyond basic versioning. It’s designed for teams, enabling multiple contributors to work on the same project simultaneously without overwriting each other’s work.
Git is fast, efficient, and flexible. It provides a structured way for data engineers to manage pipelines, scripts, and configurations. It gives you confidence that you can adapt to changes quickly without risking production environments.
Core Concepts of Git 🌳
To get started with Git, you need to understand some key concepts:
Repository (Repo): A repository is a folder where Git tracks changes to your files. It contains all the history and metadata needed to manage your project.
Commit: A commit is a snapshot of your project at a specific point in time. Think of it as hitting “save” in Git. Each commit includes a description (written by you) explaining what was changed and why.
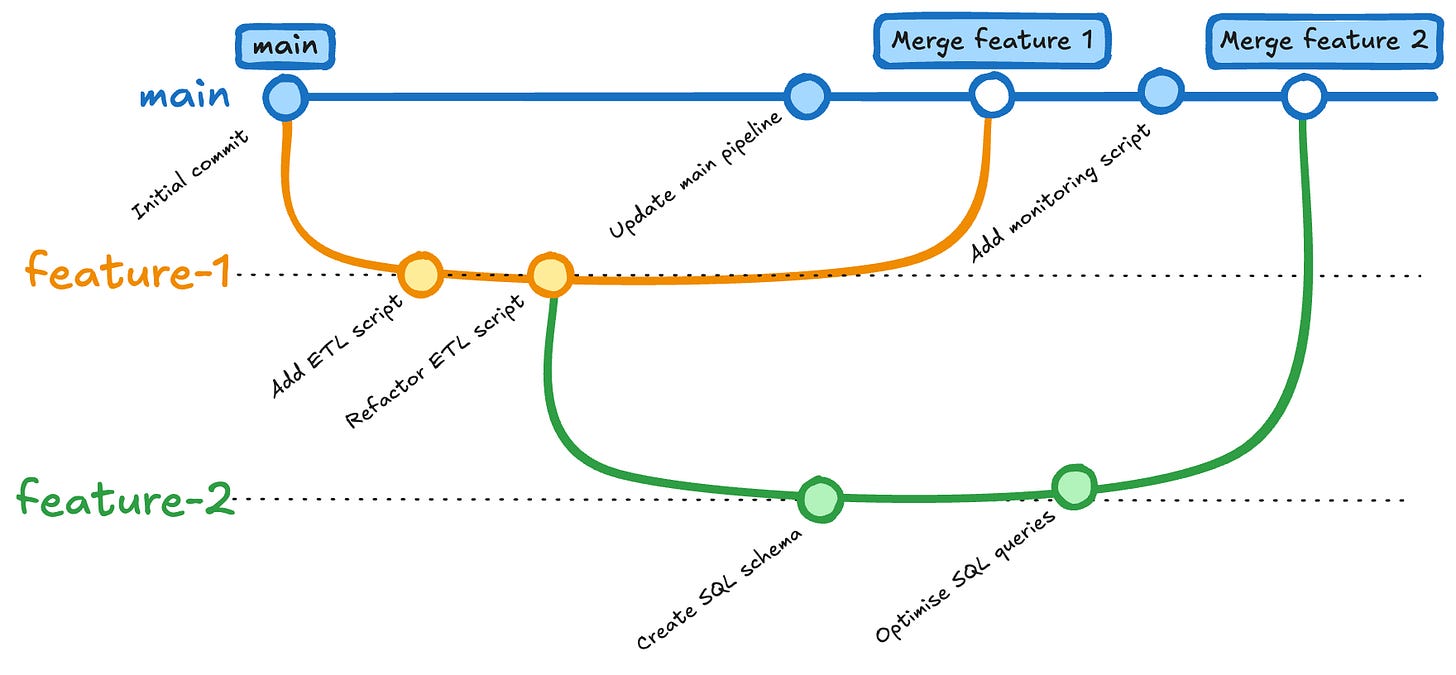
Branch: A branch is like a parallel version of your project. It allows you to experiment with new features or fixes without affecting the main codebase. Once your changes are ready, you can merge your branch back into the main branch.
Merge: Merging combines the changes from one branch into another. This is typically done after reviewing and testing new features or fixes.
Push and Pull: These commands sync your local work with a remote repository. Pushing sends your changes to the remote repository (e.g., GitHub) while pulling fetches updates made by others.
Staging Area: Before committing changes, you add them to the staging area. This step lets you decide which changes to include in the next snapshot.
By understanding these concepts, you’ll have the foundation to start using Git effectively.
⚙️ How Git Works Under the Hood
At its core, Git is a system for managing snapshots of your project. But Git doesn't save complete copies of your files every time you commit. Instead, Git takes a smarter approach: it only tracks the differences between versions.
When you make a commit, Git compares your changes to the previous version and saves what’s new or different. For unchanged files, Git links to the earlier version.
This approach makes Git incredibly efficient, even for large projects.
How Git Stores Information 🗃️
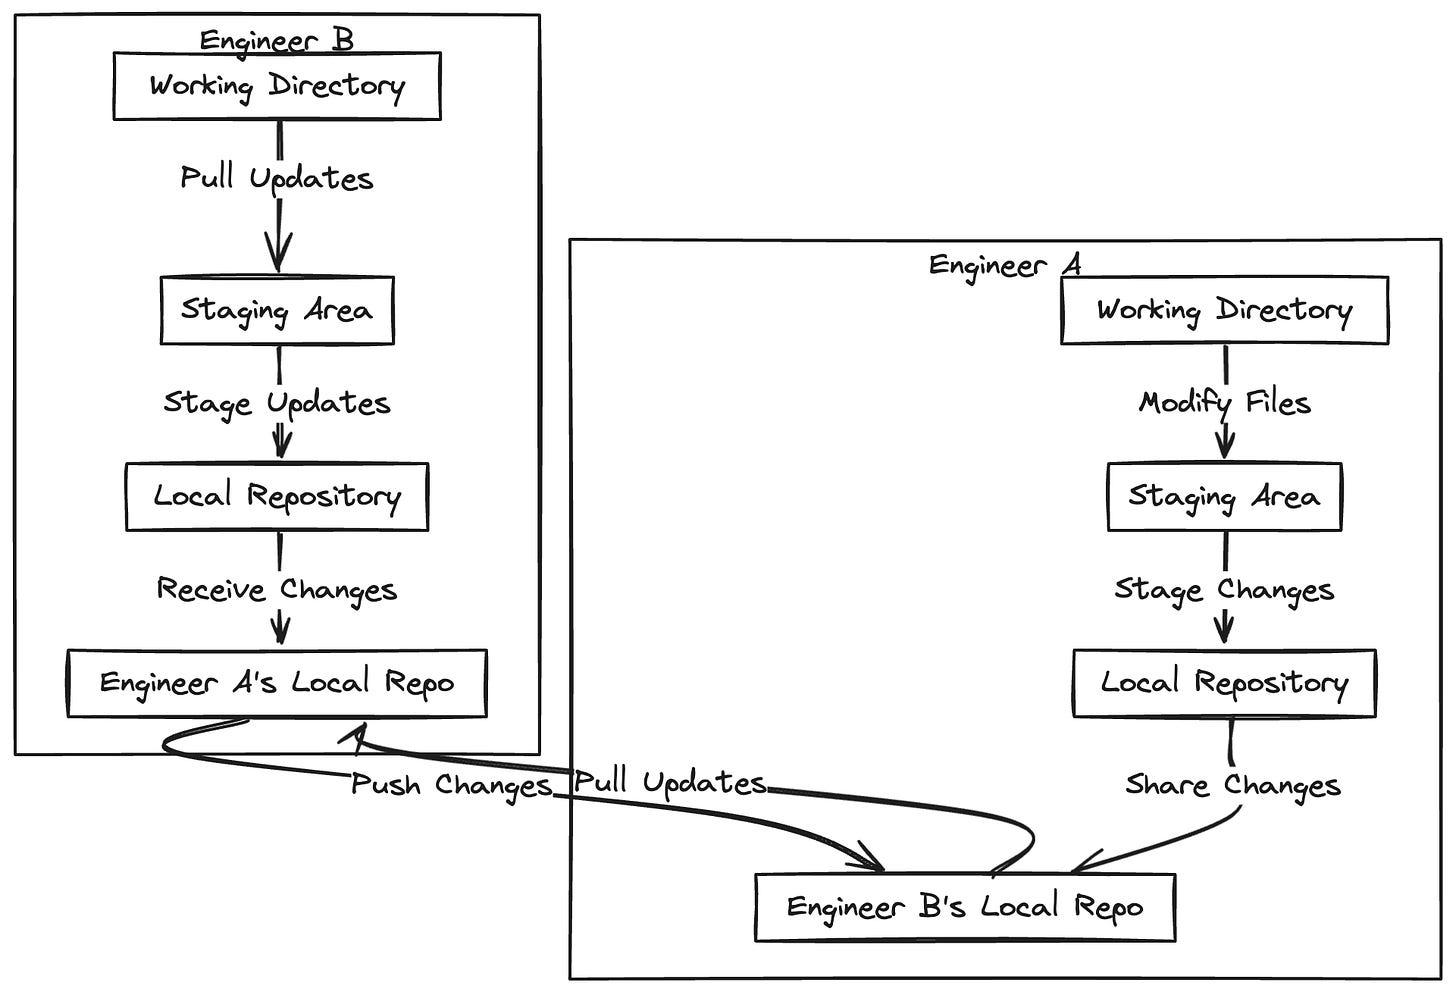
Git relies on three key components to manage your project:
📂 Working Directory: This is the folder where you actively change your project files.
✔️ Staging Area: Before committing changes, you add them to the staging area. This gives you control over what gets included in each snapshot.
📜 Local Repository: This is where Git saves your commits, including the entire history of your project.
Behind the scenes, Git represents your files as three types of objects:
🗒️ Blobs (Binary Large Objects): These store the actual file content.
🌳 Trees: These represent the directory structure of your project.
⏳ Commits: These link trees and blobs create the history of changes.
Each commit has a unique ID, or hash, that connects it to the previous commit, forming a chain. This structure makes it easy to navigate your project’s history and track its evolution.
Distributed Nature of Git 🌐
Git’s distributed design means every collaborator has a full copy of the repository, including its history. This decentralisation makes Git resilient.
Even if a remote repository becomes inaccessible, teammates can continue working locally and sync their changes later. This is especially valuable in collaborative data engineering workflows, where teams may work in different time zones or environments.

Example in Action ♻️
Let’s say you’re working on a streaming data pipeline. You want to add a new feature to process outliers in real time.
Instead of risking the production codebase, you create a new branch and implement the feature there. You test it thoroughly, and once it’s ready, you merge it back into the main branch.
Git tracks every step, ensuring the production pipeline remains stable while you innovate.
🎓 Key Steps to Get Started with Git
If you’re new to Git, it can feel overwhelming at first. But the good news is you don’t need to learn every feature or command to get started. By mastering a few basics, you can track your work, collaborate with others, and build confidence in using Git.
Step #1: Install Git and Configure It 💾
The first step is to install Git. You can download it directly from the official Git website, and it works on Windows, macOS, and Linux. Once installed, you’ll need to configure your Git environment.
Here’s how to set your name and email, which will be associated with your commits:
git config --global user.name "Your Name" git config --global user.email "your_email@example.com"This configuration ensures that all your contributions are logged properly, which is especially important when working in teams. You only need to do this once, and it applies to all your future Git projects.
Step #2: Create and Initialise a Repository 🗄️
Once Git is installed and configured, you’re ready to create your first repository. Think of a repository as the "container" for your project and its version history.
Here’s how to set it up:
Navigate to your project folder in your terminal or command prompt:
cd /path/to/your/projectInitialise a new Git repository: `git init`
This creates a
.gitfolder in your project, where Git will store all its tracking information.Add your files to Git’s staging area:
git add .Save your changes with a commit:
git commit -m "Initial commit"This creates your first snapshot, which now tracks the current state of your project.
Congratulations—you now have a Git repository tracking your work!
Step #3: Learn Essential Commands ⌘
Git is packed with powerful features, but you only need a few commands to get started:
📋 git status: This shows the current state of your repository. It tells you which files have been modified, which are staged for commit, and more.
🕒 git log: View the commit history of your project. You’ll see each commit’s unique ID, the author, and the commit message.
± git diff: Compare changes in your files before committing them. This helps you see exactly what has been added, removed, or modified.
⏪ git checkout: Revert your working directory to an earlier commit.
🔀 git switch: Switch between branches.
Spend time practising these commands in a small project to get comfortable with them.
Step #4: Sync with a Remote Repository 🔄
While local repositories are great for personal projects, you’ll often need to collaborate with others. Or at least you'll need to back up your project.
Remote repositories, hosted on platforms like GitHub, GitLab, or Bitbucket, allow you to share your work and sync changes with your team.
To push your code to a remote repository:
Add a remote URL (e.g., a GitHub repository):
git remote add origin <repository_url>.Push your local changes to the remote repository: `git push -u origin main`.
This will upload your project and its history to the remote server, where your teammates can access and update it.

😨 Overcoming Challenges with Git
Like any new tool, Git comes with a learning curve. Here are a few common challenges beginners face and how to overcome them:
😵💫 Feeling Overwhelmed by Commands: Git has dozens of commands, which can feel daunting at first. Start small by mastering the basics: add, commit, push, and pull. You can explore advanced features like rebasing and fixups as you become more comfortable.
🤜🤛 Merge Conflicts: Merge conflicts occur when two people modify the same part of a file. Git will flag these conflicts and ask you to resolve them manually. Use git diff to identify the conflicting changes, and communicate with your teammate to decide how to merge them.
🔁 Forgetting to Commit Regularly: A common beginner mistake is waiting too long between commits. To avoid this, commit frequently and write clear commit messages. For example, Instead of “Fix stuff,” write “Fix bug in data validation step.”
By addressing these challenges, you’ll build confidence and avoid common pitfalls.
💭 Final Thoughts
Data engineering requires an expanding set of skills.
When I ask data engineers about their skill sets, the answers are often the same: Python, SQL, data modelling, and cloud infrastructure.
People don’t skip Git because it’s unimportant. They skip it because it’s so fundamental that it’s easy to take for granted.
That said, Git is easy to pick but hard to master. I plan to explore Git further in future content and guide you step-by-step to become a pro user.
While junior data engineers may not need to know every Git trick, I often test senior professionals on their Git skills during interviews. For experienced data engineers, strong Git knowledge separates the good from the great.
If you’re new to Git, don’t let its complexity intimidate you. I’ve trained many people in the past and seen complete beginners transform into Git wizards in a couple of months.
If they can do it, you can do it, too.
Did you know? I wrote an extensive Snowflake learning guide. And you can have this for free!
You only need to share Data Gibberish with 5 friends or coworkers and ask them to subscribe for free. As a bonus, you will also get 3 months of Data Gibberish Pro membership.
🏁 Summary
In this article, you’ve learned why Git is an essential tool for data engineers and how it transforms the way you work with code.
You started by understanding how version control solves problems like accidental overwrites, lost progress, and messy project organisation. You and I explored Git’s core concepts, from repositories and commits to branches and merges, giving you a clear foundation to start using Git effectively.
Then I pulled back the curtain to explain how Git works under the hood and showed you how it efficiently tracks changes with snapshots and links them together in a robust history.
You discovered that Git isn’t just about saving your work. It’s mainly about experimenting safely, collaborating seamlessly, and always having a backup of your project.
Finally, you learned how to take your first steps with Git: installing it, creating repositories, committing changes, and syncing with a remote server.
These basics form the backbone of Git and will help you stay organised, avoid costly mistakes, and work more confidently as your projects grow.
So, what’s next? Have you installed Git yet?
Until next time,
Yordan
😍 How Am I Doing?
I love hearing you. How am I doing with Data Gibberish? Is there anything you’d like to see more or less? Which aspects of the newsletter do you enjoy the most?
Use the links below, or even better, hit reply and say “Hello”. Be honest!


Great article!
I have often found that one of the primary reasons that some analytics specialists and data engineers don’t “like” using git is that they don’t really internalise the underlying conceptual makeup of git and just try to learn the main “commands”.
For example, someone will learn that in order to share their work with remote they need to “git add -> git commit -> git push” even though there’s a tonne of stuff happening during those phases: you are staging your work with “add”, creating a commit node in the tree with “commit” and syncing your local HEAD / branch with the remote with “push”.
What inevitably always happens is that, at some point, somebody encounters an issue (eg a merge conflict) and then has no idea what is happening because they don’t really understand version control - they’ve merely attempted to “memorise” git instead which makes it harder to resolve issues as and when they arise.